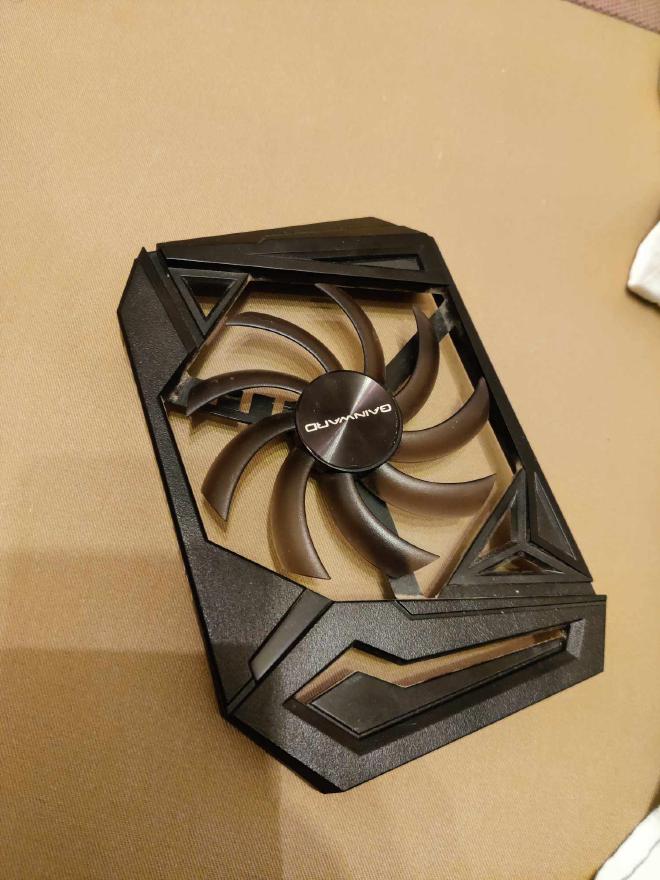
I’ve had some issues with my GPU recently, at one point the fan just refused to stay in the shroud. Changing the fan would not have been a valid solution, as in my situation, the fan was being held up by the shroud, furthermore, in the pc case it was positioned to face downwards.
You can also check if your GPU has shroud that someone made a 3D print of online, you might be able to print it yourself or request it to be printed in your local 3D printing company. If that does not work for you, let me show you what I did. Just read through, maybe the simplest solution doesn’t work for you either.
The simplest solution I’ve come up with cost me around 14 euros (1 case fan). What you’ll need is:
- Your GPU;
- Same amount of case fans as the amount of shroud fans (in my case- one) and of roughly the same size as on your shroud;
- (If multiple fans) 4-pin splitters, amount depends on quantity of case fans (3 fans? either 2 splitters of 2-to-1 or 1 splitter of 3-to-1);
- Zip ties;
- (Recommended) 4-pin to PWM adapter;
- (If no adapter) Make sure you have 4 pin port to stick your case fan into on the motherboard, you must get 4-pin to PWM adapter or get a splitter or a fan hub otherwise;
- (Optional) Thermal paste that works with aluminum (it will say if it doesn’t);
- (Optional) Thermal pads;
- (Optional) GPU support bracket.
Notes:
- If you have multiple fans, you might want to check if your motherboard has enough 4-pin connectors, even if you’re getting one case fan, check if it has at least 1 free 4-pin fan port. You might want a 4-pin splitter (or multiple), a fan hub, or a 4-pin to PWM adapter (splitters + adapter if multiple fans obviously).
- A 4-pin to PWM adapter will allow your fans to be regulated based on the temperatures of GPU, it might be not possible to do otherwise. I don’t do too many GPU intensive tasks so I do not worry too much about it and regulate it based on CPU temps (with set manual lower thresholds in BIOS). I only have a 4-pin port available that is one out of two ports made specifically for CPU cooling, so I can only make it directly dependable on CPU temperatures.
- If removing heatsink, might as well change thermal paste, thermal pads shouldn’t be removed or damaged, but I always have one to account for my clumsiness.
- Make sure you have enough space in your pc case that the fans will fit, might want to get smaller fans if necessary. Consider that when attaching the gpu, the fans don’t stick out too much towards the motherboard, so you can actually plug in the GPU.
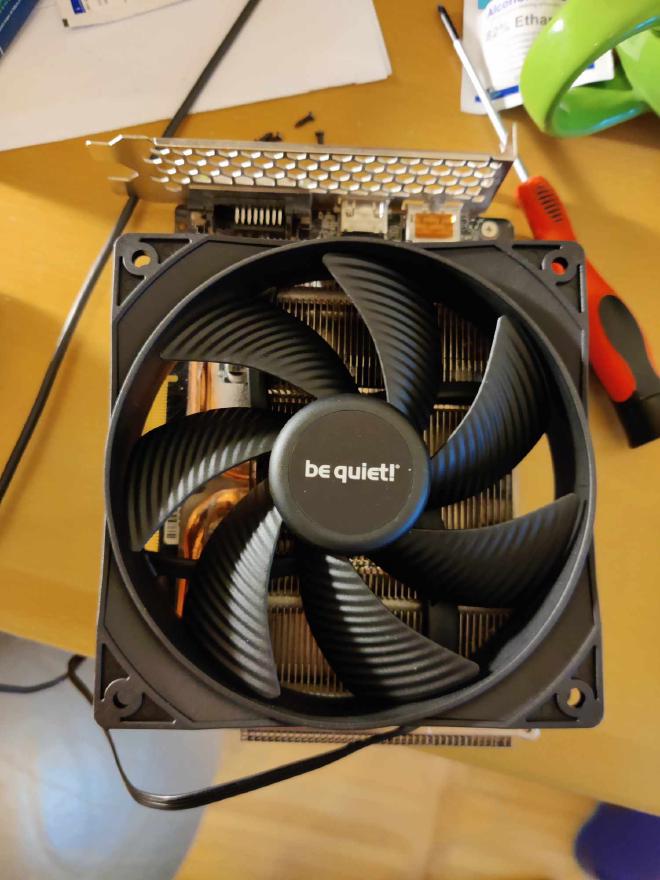
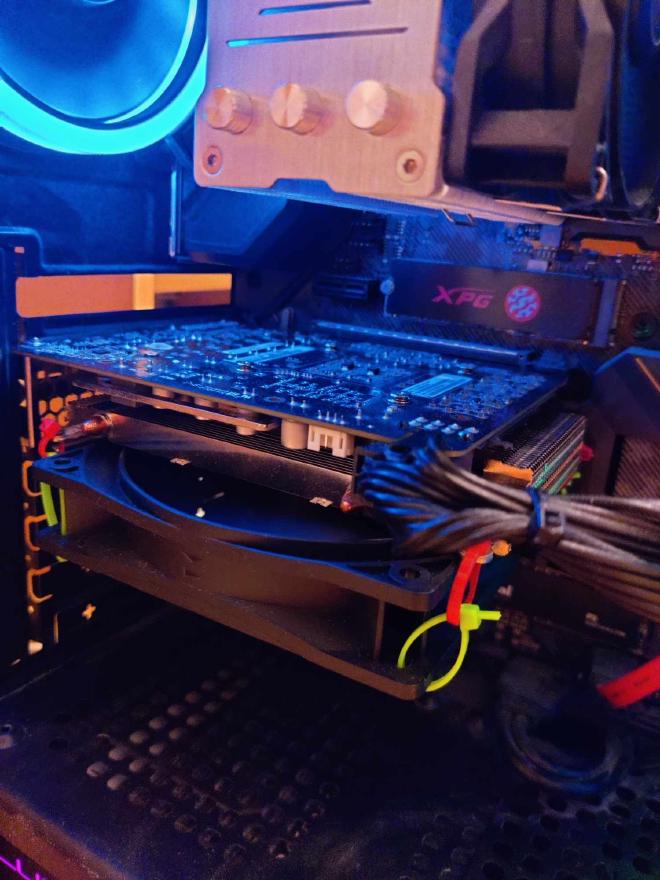
Take your gpu, unplug the fan and unscrew the shroud. If you have to unscrew the heatsink might as well replace the thermal paste of the GPU. Make sure the fans are facing outwards from the heatsink, as the “mighty internet” says the gpu fans are exhaust fans, and not intake. (check for arrows on the sides of these fans). You have your GPU with heatsink attached, but without the shroud and the fans: place your fans on the heatsink, check out if everything fits, connect them via splitters and attach them firmly with zip ties to each other. Plug in the PWM adapter right or make sure it fits when you get the fans going (if you got the adapter). Next, find the holes on the heatsink corners for screws to attach your shroud onto, and grind down 4 small zip ties to fit through those holes. You can either attach these to the fans right now, or make small hoops/rings as handles dangling, so you dont have to grind down these zip ties over and over if you need the fans to get refitted. If you got handles made, zip tie around them and the corners of your fitted GPU fans to hold firmly in place. If issues arise around getting fans attached to the heatsink corners, consider having zip ties around GPU I/O bracket before any other part of the GPU. Connect the GPU to the motherboard and you should be good to go and insert the GPU into the motherboard. If you haven’t used PWM adapter, go ahead and plug your case fans into the motherboard. If you got yourself a GPU support bracket, get that in place now. Start up the PC and check if the fans are turning. If they are not, might be faulty fans, bad splitter set up, or BIOS needs more configuration. If no PWM adapter, go into BIOS, get to the fan settings, get a photo or write down the default settings and change it to your liking. I set the fan control to manual, changed the fan speed to be a little faster than the default (lower thresholds). If you are constantly running GPU intensive tasks, put the fan speed to permanently be at maximum speed. If you do not see the fan separated, it might mirror the settings of the CPU fan. You are ready to operate your machine, captain. Just to be entirely sure get something to monitor the CPU and GPU temperatures, I recommend OpenHardwareMonitor.
I might have overcomplicated it, but better to write more than to write less on something practical and with room for failure.
Do the modification at your own risk, don’t hold me liable for the advice, dont trust blindly strangers on the internet!
I would love to hear your thoughts, my beloved reader ❤


